Hello again, this are the steps to prepare your USB for DOS mode and flush BIOS.
Before you continue on any step read those red lines very carefully!!
If flushing BIOS fails, the damage may be beyond all repairs, it is recommended to take your PC
to computer shop for repair.
In an event of such failure I shall not be responsible for the damage.
It is not 100% guaranteed these steps will work.
Now if you are willing to take a risk follow these steps:
1. Preparing USB
Flushing MSI motherboard bios can only be done
with USB, not DVD/CD
Make sure your USB work correctly and has no problems such as disconnecting randomly (that would be fatal)
1. Attach your USB to working computer with windows installed on it, anything on that USB will be erased,
if you have data on it, make a backup.
2. Open command prompt (
cmd.exe) as Administrator
NOTE: To open command prompt click on start key and type cmd, right click on cmd and run as Administrator.
3. type or copy paste bellow commands and hit enter after each one
diskpart
lis dis
lis vol
4. Above commands will list disks on your working PC where USB is attached,
take a good look to find out which of the disks is your USB.
You can tell this by the size of your USB, or label of USB.
5. then if it is Disk 1 for example execute bellow commands for disk 1 (
replace 1 with the actual disk number representing your USB drive).
Otherwise you may end up formatting partition on your laptop/PC)
sel dis 1
clean
cre par pri
6. Note do not replace number 1 in below command, use it as it is
sel par 1
format fs=fat32 quick
assign
active
exit
7. Good, now your USB is bootable!
suggested using Chrome, Firefox 3.0 or IE 9.0 above browsers to download BIOS, Drivers.
suggested to use 7-zip to extract downloaded file.
8. Download following
BIOS
9. Extract
E7721V24.exe onto your desktop first, if extraction is OK, no errors or warnings,
then copy the exe file from desktop to your formatted USB.
10. safe remove USB key from PC and attach it to computer with this boot issue.
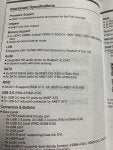
11. The above BIOS executable is from bellow link, you may want to double check make, model and downloaded file:
https://www.msi.com/Motherboard/support/FM2-A75MA-E35
2. Flushing BIOS
System will restart several times to update system BIOS with NVRAM & ROMHOLE.
Please DO NOT remove the USB pen drive until BIOS updated successfully.
Please make sure you have read the SOP before you update the BIOS.
Note the above pdf instruction tells to extract zip file to USB, we extract the exe file alone instead. (not sure how could rar file be booted??)
1. Boot your system from a USB storage device, you need to find out which one is the boot menu key,
to invoke boot menu, For MSI motherboard this is the F11 key, Rapidly tap the F11 key while the machine is booting.
NOTE: Other keys to try if F11 doesn't work are: F10 or F12 or F2 or DEL.
3. when boot menu appears select your USB key and hit enter to boot from it.
4. When you get the DOS prompt, execute the following sequence:
note the last letter is zero not letter 'o')
afude238 e7926ims.1a0
5. After you execute above command flushing procedure will begin, Reboot your system when prompted!
6.
After bios update is done, C: prompt will appear on your screen.
7. press CTRL + ALT + DELETE to restart machine, after system restart, Press DELETE key to enter BIOS setting menu to make sure that BIOS have been updated successfully.
Note: If CTRL + ALT + DELETE doesn't reboot, simply power off PC and turn it on again, then delete key to enter bios.
Now if everything went fine and you entered BIOS and are able to play with settings, restart again without changing any setting and see if it boots into Windows.
If not report here, we'll see what settings to do next in BIOS. just make sure you do not change any settings until that time.